In the Spring Framework, Beans are the fundamental building blocks of an application. They represent objects that Spring manages and wires together.
Understanding the Spring Bean Lifecycle is crucial for efficient resource management and customization.
What Are Beans in Spring?
In Spring, a Bean is an object managed by the Spring container (a.k.a. IoC Container). The container creates, configures, and manages these beans throughout their lifecycle.

How to Create a Bean in Spring
Spring provides multiple ways to create a bean, but in this blog, we'll focus on one approach: using @Component on a class, which will create a bean for that class
@Component
public class BeanB {
    public void performAction() {
        System.out.println("BeanB is performing an action!");
    }

    @PreDestroy
    public void cleanup() {
        System.out.println("BeanA is being destroyed!");
    }
}
@Component
public class BeanA {
private final BeanB beanB;
@Autowired
public BeanA(BeanB beanB) {
this.beanB = beanB;
}
public void doSomething() {
beanB.performAction();
System.out.println("BeanA is working!");
}
@PostConstruct
public void init() {
System.out.println("BeanA has been initialized!");
}
}To explore other methods, check out our What Are Bean And How To Create Them.
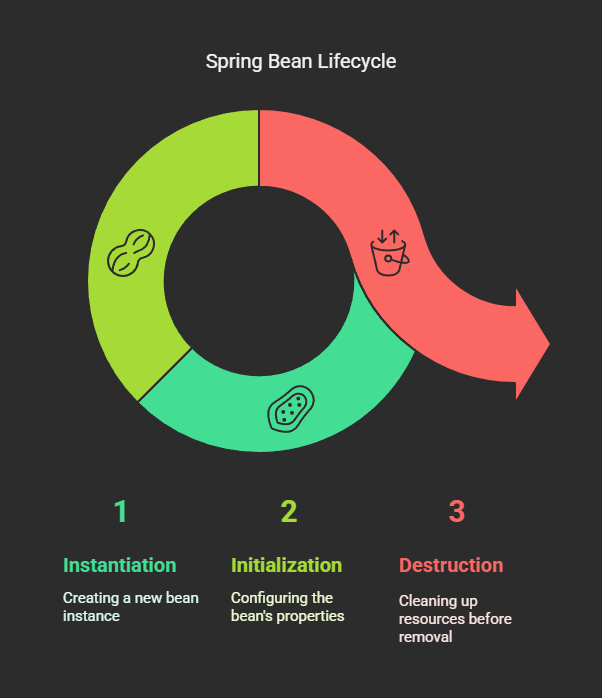
What is the Spring Bean Lifecycle?
The Spring Bean Lifecycle consists of multiple phases. Understanding these phases allows developers to hook into the lifecycle and execute custom logic when needed.
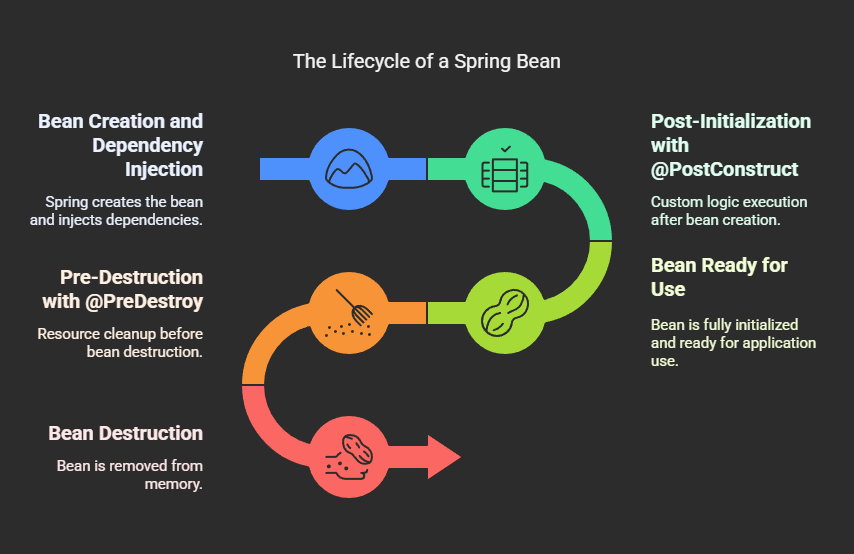
1. Instantiation
- The Spring container creates an instance of the bean using the constructor or factory method.
In Our BeanA & BeanB Example: Spring automatically detects BeanA, along with its dependency BeanB, and creates an instance of both.
2. Dependency Injection (DI)
- The container injects dependencies into the bean as defined in configuration.
In Our BeanA & BeanB Example: Spring injects an instance of BeanB into BeanA, ensuring that it has everything it needs to function.
3. Post-Initialization: @PostConstruct
- Spring allows post initialization custom logic via
@PostConstruct
In Our BeanA Example: The init() method will be called right after BeanA is created and dependencies are injected.
4. Bean Ready for Use
- At this stage, the bean is fully initialized and ready for use in the application.
5. Pre-Destruction: @PreDestroy and DisposableBean
- Before destruction, Spring provides a way to clean up resources.
- It is useful for closing database connections, stopping background tasks, or freeing resources.
In Our Example BeanA: Before shutting down, Spring will call cleanup()
6. Bean Destruction
- The container removes the bean from memory when the application shuts down.
⚠️PS: @PostConstruct and @PreDestroy are not mandatory for bean creation; they are used here for explanatory purposes.
Conclusion

Understanding the Spring Bean Lifecycle helps in effectively managing resources and customizing behavior where needed. By leveraging lifecycle hooks like @PostConstruct and @PreDestroy, developers can create more efficient and robust applications.
Want to learn more?
Want to dive deeper into Spring? Start by experimenting with different bean scopes and lifecycle methods in your projects!
👉 Read Next: What Is Dependency Injection In Spring?